


Results 1 to 10 of 72
|
|
Threaded View


-
Life Is Good!

- Join Date
- May 2008
- Location
- Guangdong, China
- Posts
- 1,509
 08-11-2008, 04:56 AM
Decided to take the plunge and do the valve adjustment this weekend. I took some notes and pictures so people can see it's really not that difficult. I'm fairly sure all the Chinese motorcycles use a rocker arm design. The benefits of this are lower manufacturing costs and easy adjustments. The downside being more frequent adjustments and accelerated wear on the guides due to lateral friction.
The shim under bucket design that is found in most modern motorcycles requires less maintenance, but can be a real PITA because you need a set of shims and generally must remove the camshaft to perform the adjustments.
I worked in a Suzuki dealership in the late 80's and early 90's. At that time, almost all Suzuki models were using the rocker arm adjuster. We performed a first service at 600 miles and the valve adjustment was part of that service. I would say about half the bikes serviced were out of spec. Suzuki usually recommended 4000-8000 miles between valve adjustments. After the initial adjustment, most of the bikes we serviced stayed within spec and rarely required further tweeking until they reached high mileage.
I think it's safe to say that most people don't touch their valves for two reasons. #1 Shops charge an arm and a leg for it because it's very time consuming. #2 Noisy valves usually won't stop the bike from running, and most people ignore maintenance until they are stranded on the road.
With that said, I think it's best if you perform an initial valve adjustment at 1000 kilometers and then check them every 5000 kilometers.
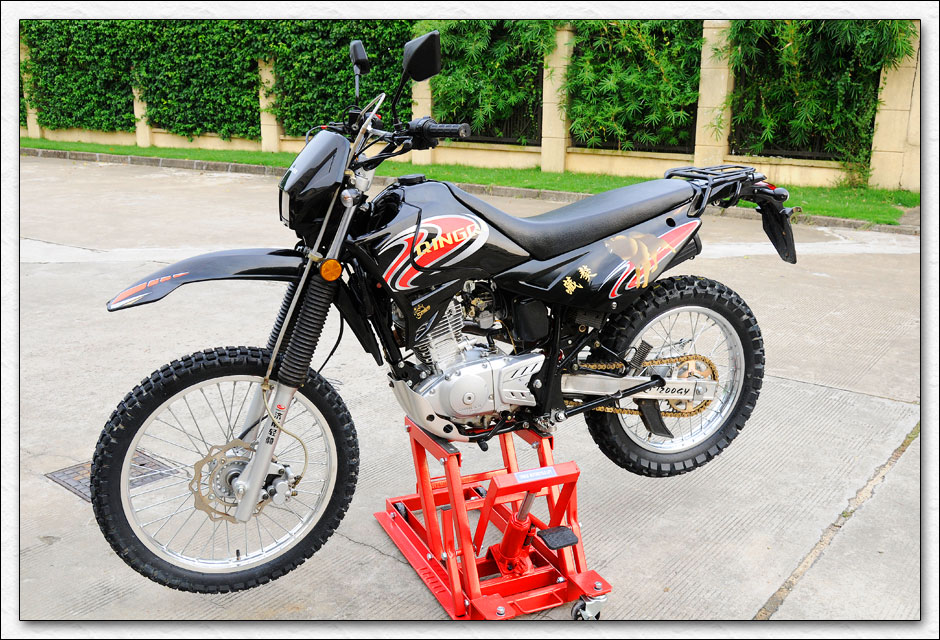
So let's get started..... I always like to start with a clean bike before tearing her down and getting inside. You are going to have a few areas of your engine exposed during the process, any loose crud hanging around your engine could fall inside and really ruin your day. Also not a bad idea to use a work stand for this operation.
Ain't She Purdy!
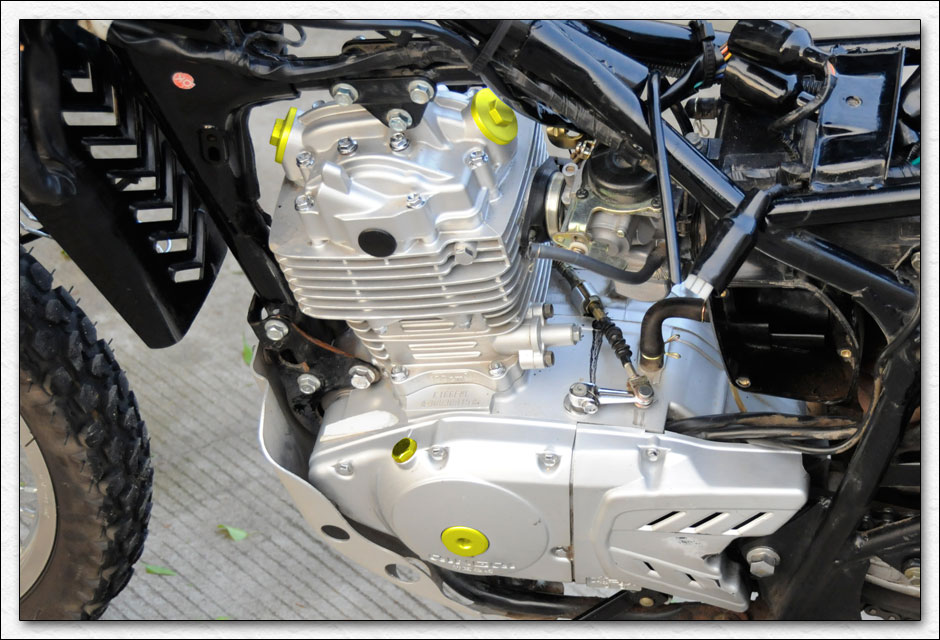
I would recommend pulling the seat, side panels and tank off. It's not absolutely necessary, but it makes the process a lot easier. Now that she's naked, remove the spark plug and the four items marked in yellow in the following picture.
#1 Front Valve Cover 17mm spanner
#2 Rear Valve Cover 17mm spanner
#3 Timing Mark Cover 17mm spanner
#4 Small Engine Cap 10mm Allen Wrench
Put your 17mm socket inside the hole, where the 10mm allan cap was, and rotate the engine around (counterclockwise) until you see a mark on the flywheel indicating Top Dead Center. Verify you are at Top Dead Center (TDC) by checking the position of the piston through the spark plug hole. If you got it right, you can grab one of the rockers and wiggle it a bit. Remember, this is a four stroke engine, the piston will be at TDC twice during the four strokes. This is what you should see through the inspection hole if you got it right.

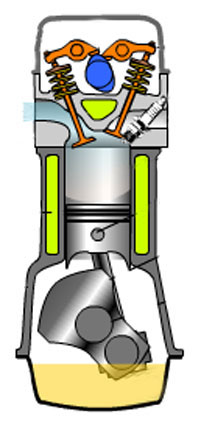
Now, let's have a look at one of the valves. This happens to be the intake valve, but it is identical to the exhaust valve.
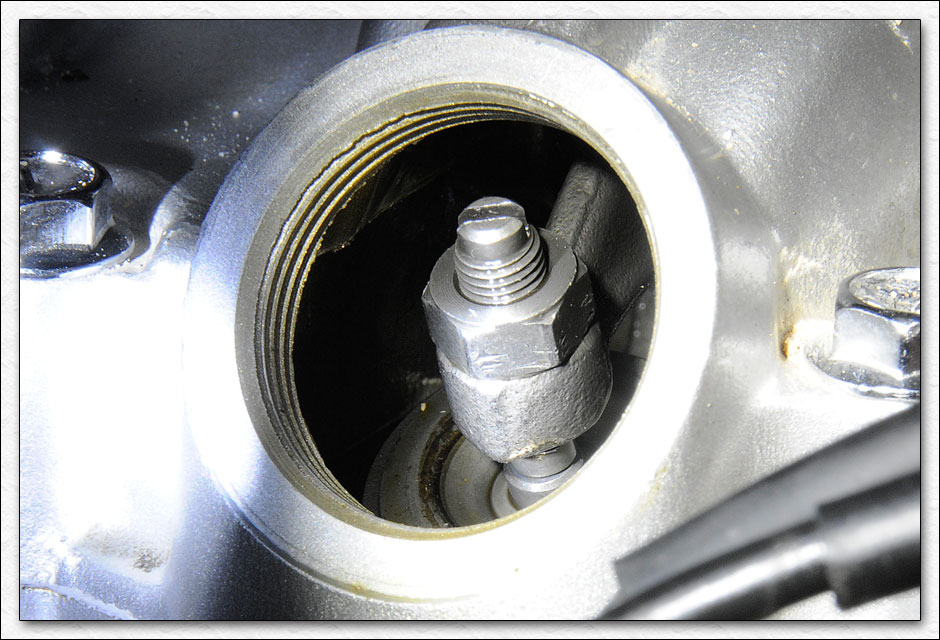
Here's some colour coding and explanations for you first timers.
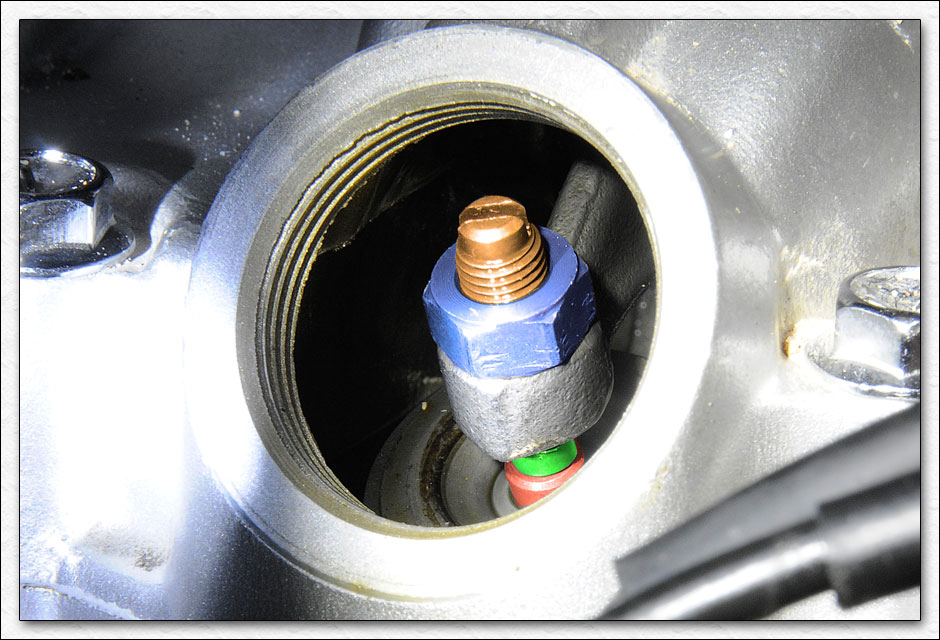
The first thing you need to understand is what we are adjusting here. At the bottom, you will see a Green part and a Red part. We are trying to measure and set the gap (space) between these two items. The Orange screw at the top is what you will turn to make the adjustment. The Blue nut keeps everything tight after you have made the adjustment. Pretty simple
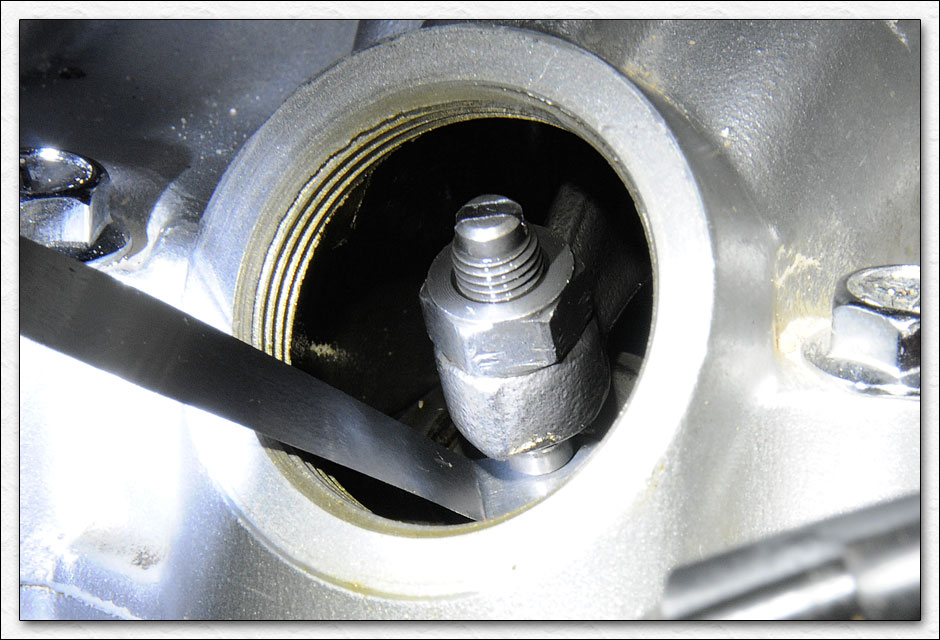
You will need a set of feeler gauges to measure the gap. First thing you want to do is check the current gap, maybe your valves don't need adjusting. Through CrazyCarl, we have learned that the correct specification is .06mm to .08mm for both the exhaust and intake ports. Take a .09mm gauge and slip it in. If it goes in, you're valves are too loose. Take a .06mm gauge and slip it in. If it doesn't go in, your valves are too tight.
If you need to adjust them, loosen the nut and back the adjuster screw out. Insert a .07mm gauge and carefully tighten the adjuster until it lightly pinches the gauge. You should be able to pull the gauge out. Now tighten the lock nut down without rotating the adjuster screw (not easy unless you have 3 hands). If you did it correctly, the .06mm will easly slip in, the 07mm will slip in with a little wiggling and the .08mm will not go. If you can't get a .06mm in there, they are too tight. If you can get a .09mm in, they are too loose.
Now that you have both the intake and the exhaust valves adjusted, step back and drink a beer It's a good idea to verify your work, so rotate the engine a few times and then check them again. Be patient, you probably won't get it right the first time, I didn't
 If everything appears to be in good working order, put the bike back together and fire it up. With any luck she will be smooth as silk. If you hear some nasty clacking sounds, immediately shut the bike off and check the valves again.
I took a quick run around the block and the bike definately responds better and the engine sounde nice and smooth. I will need to take her out for a good thrashing and see if this helps with the stalling issue I have been encountering all along.
Cheers!
ChinaV


| « Previous Thread | Next Thread » |
| Bookmarks |
Bookmarks |


A Working VPN Solution?
04-11-2024, 03:10 AM in Off Topic Discussions